

How To Repair Sagging Camper Ceiling
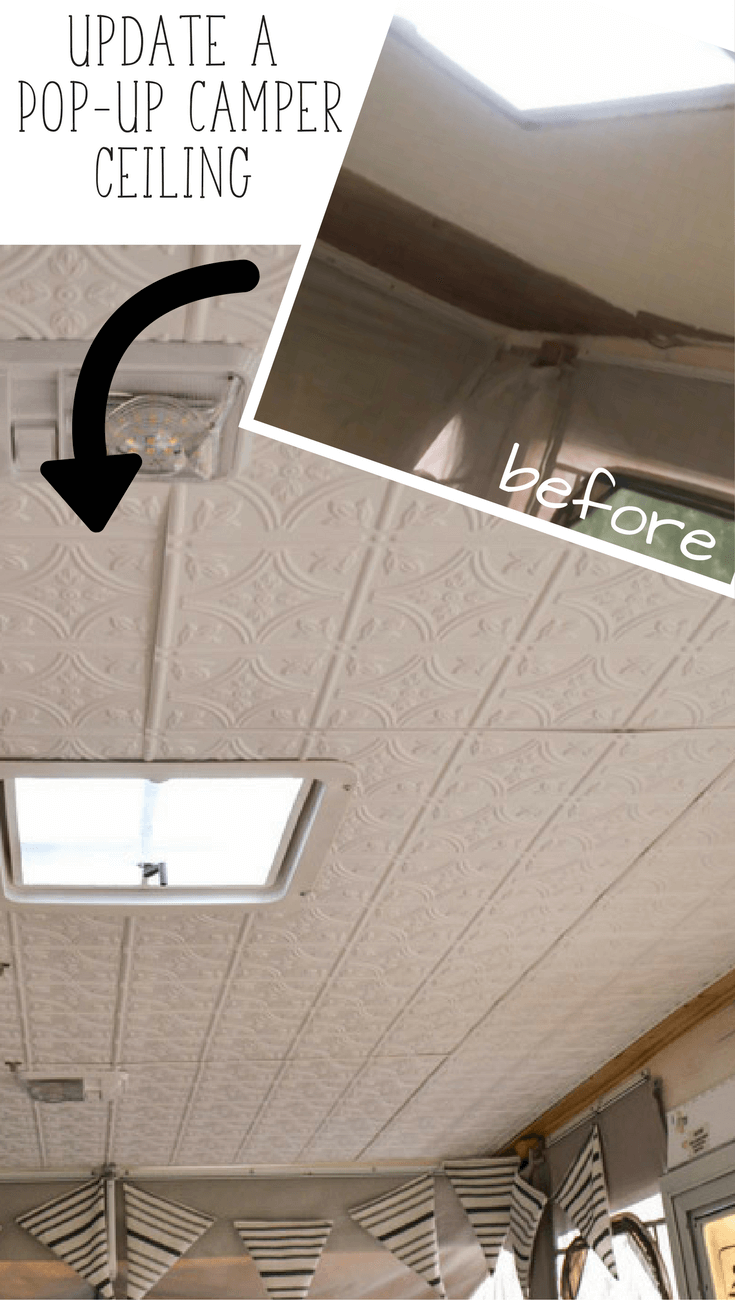
After rebuilding and repairing our water damaged camper roof, we needed a style to cosmetically prepare the ugly ceiling inside the camper. These ceiling tiles are lightweight and easy to apply and volition instantly update the look of your RV or camper ceiling!
This is a mail sponsored by DIYdecorstore.com. I received product and/or monetary bounty to write this mail service; all the same all opinions and ideas are 100% my own.
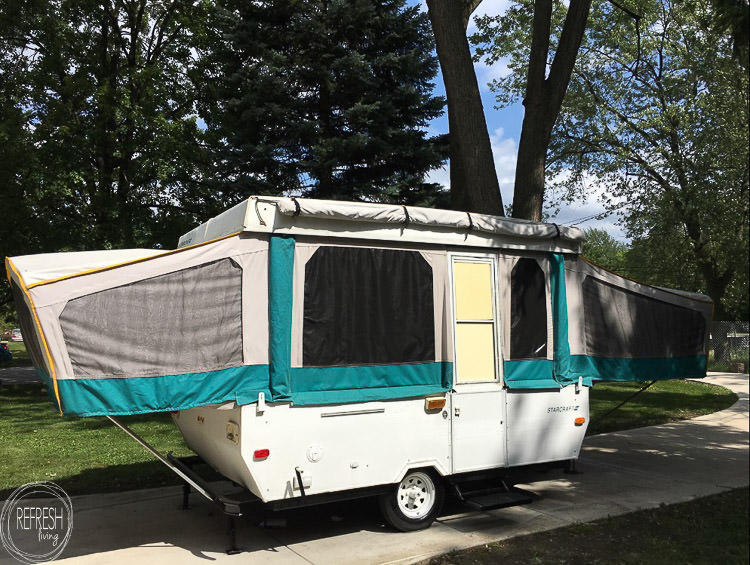
A few months agone I fabricated a scrap of an impulse purchase and bought this 1994 pop-up camper for cheap, inexpensive, cheap. Well, I basically got what I paid for, because the roof was completely rotted away and needed to be rebuilt. I'll be posting some videos of that process later on, but for now, I want to show you an easy mode to update or refinish the ceiling of your camper (or any room in your room, for that matter!).
We rebuilt the entire frame of the roof, but because the surface area of the roof is really a thick layer of cream, we decided to allow that dry out, completely, and then repair the interior impairment in a corrective mode.
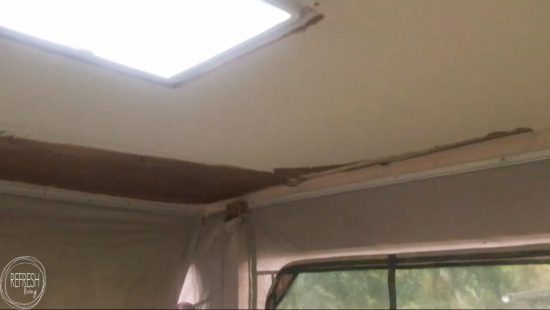
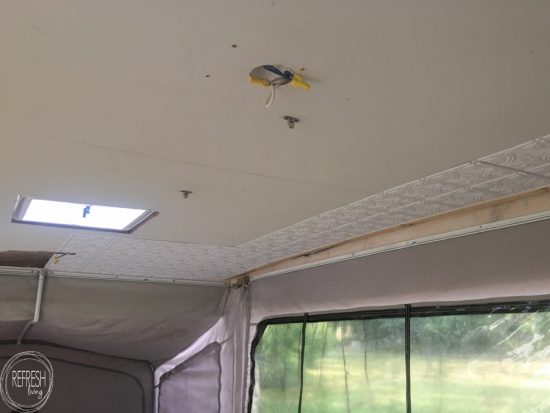
The interior ceiling of our pop-up is a thin sheet of luan that is attached to the cream. And although there was definitely water damage, we were able to peel away the rotted, damaged woods, but continue the rest of it in-tact. This slice of luan is not providing any sort of structure to the roof, so later removing the nasty, I felt comfortable merely covering it upward.
I debated using a sheet of dewdrop board, simply in a camper that we'll be towing with our minivan, I didn't want to add unnecessary weight. (Nor did I desire to struggle with adhering large pieces of paneling to the ceiling, either.)
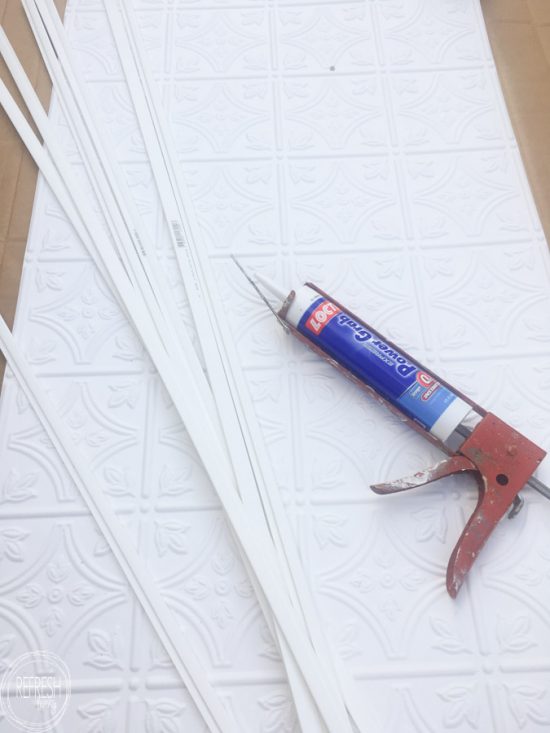
That's when I found this production: Fascade Gum-Upward Ceiling Panels. A super light-weight piece of material that can only exist glued up, and expect like a painted tin ceiling? Aye, delight, permit'due south get this little camper looking similar new again!

Click hither to read my full disclosure policy.
These panels are so like shooting fish in a barrel to use. They can be cut with a pair of pair of scissors, if that'due south all you have on hand, and glued upward with Loctite Power Grab Limited Construction Adhesive. Hither'south a quick tip. The company recommends using Loctite adhesive, and I would strongly agree with this. I ran out of my first tube and decided to use a different brand of adhesive that was supposedly quick grab. Let's only say I had ceiling panels falling on my caput while a few choice words flew out of my oral fissure. I had to catch another tube of Loctite agglutinative before I could finish!
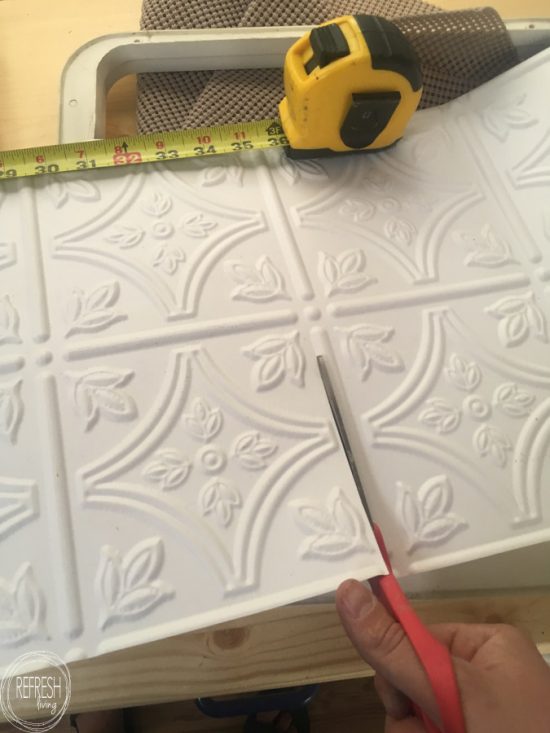
It's of import to follow the instructions for planning out the layout of your ceiling offset. All the instructions are provided with the product, or tin be found here.
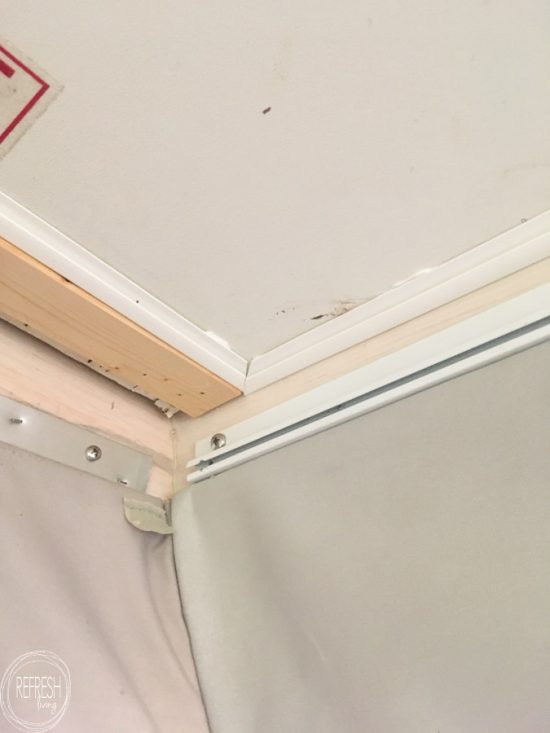
I was a tad bit short on the width of the panels, and then rather than buying a few more than, I decided to just put up corner moulding and a strip of sparse board. I installed the J-trim effectually the perimeter of the ceiling with Loctite adhesive and finishing nails.
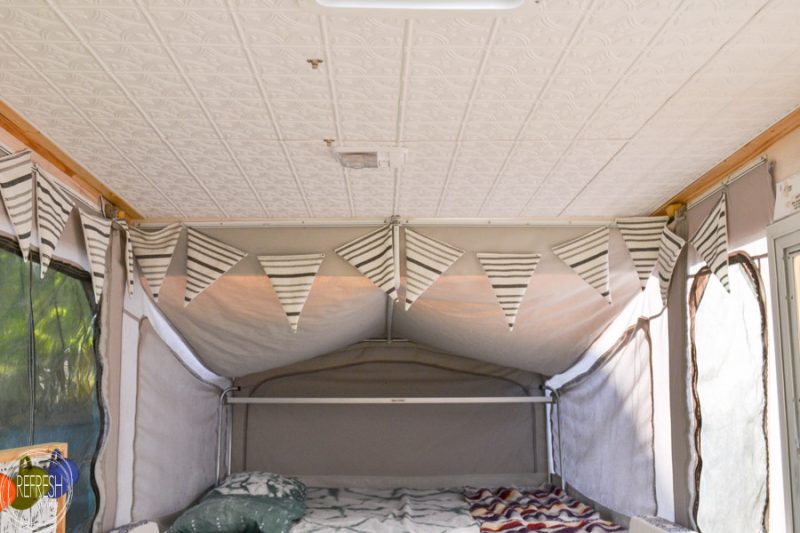
Subsequently cutting the first row to size based on the dimensions of my ceiling, I applied the panels with the adhesive and continued working until the entire surface was covered.
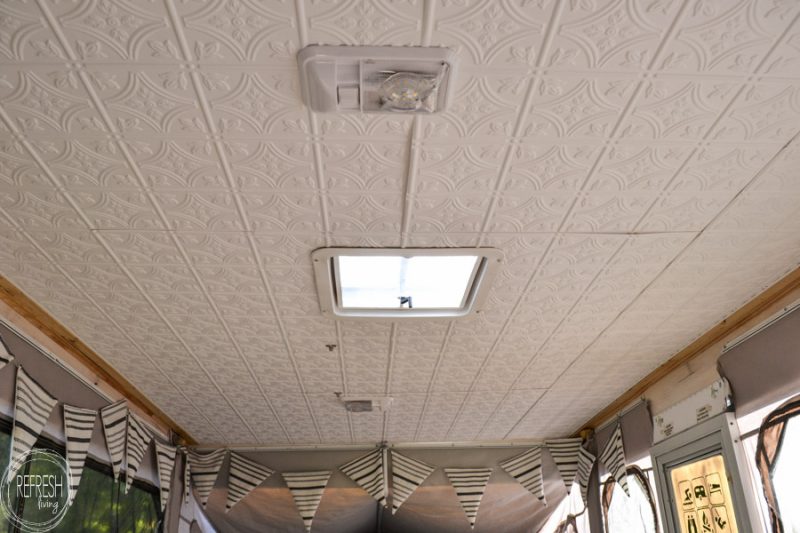
It was such an easy projection, and it completely transformed the wait of the space. I recollect information technology looks as expert as new; what do you lot remember?
Fascade makes the aforementioned blueprint of tiles, in a slightly thicker material, that can exist used for backsplashes. I'll be sharing how I used them to update our picayune kitchen area soon!
Similar it? Pin Information technology. (Thank you!)
You tin can notice all of my other pop upwardly camper remodel projects here.
Like what y'all come across? I'd dearest for you lot to follow forth!

Sharing at these awesome weekly parties!

Join the Refresh Living DIY & Upcycling Community
Bring together the subscriber list to receive one to ii emails per month with updates from the weblog. PLUS, you'll gain admission to my printables and graphics library. Every new design I create will be added here, and you'll take free access - forever!
Virtual high v! You're ane pace abroad; just bank check your email to confirm your subscription.

How To Repair Sagging Camper Ceiling,
Source: https://refreshliving.us/repair-ceiling-on-pop-up-camper/
Posted by: cahoonladvized.blogspot.com
0 Response to "How To Repair Sagging Camper Ceiling"
Post a Comment